Hello everyone, I’ve recently been playing around with LibreNMS and love its functionality. Like many before me though, I’ve needed some sort of way of reporting on the info that LibreNMS provides. Honestly, something as simple as a view of the dashboard with all the information necessary for the “report” would be great to have. Disclaimer: I am by no means a software developer, and this is actually my first foray into scripting/coding of any kind. I came up with a method of retrieving the dashboard in the form of a screenshot and emailing it to a customer. This method also allows for multiple instances of LibreNMS to be targeted if needed. Before you can get it working though, you’ll need ask yourself a few questions:
- Do I have access to a Windows box?
- Do I have access to a Google Domain SMTP server or something similar?
- Can I stomach working with Powershell and Puppeteer/JavaScript?
If you answered yes to all of these, then this solution may be for you! On to the tutorial…
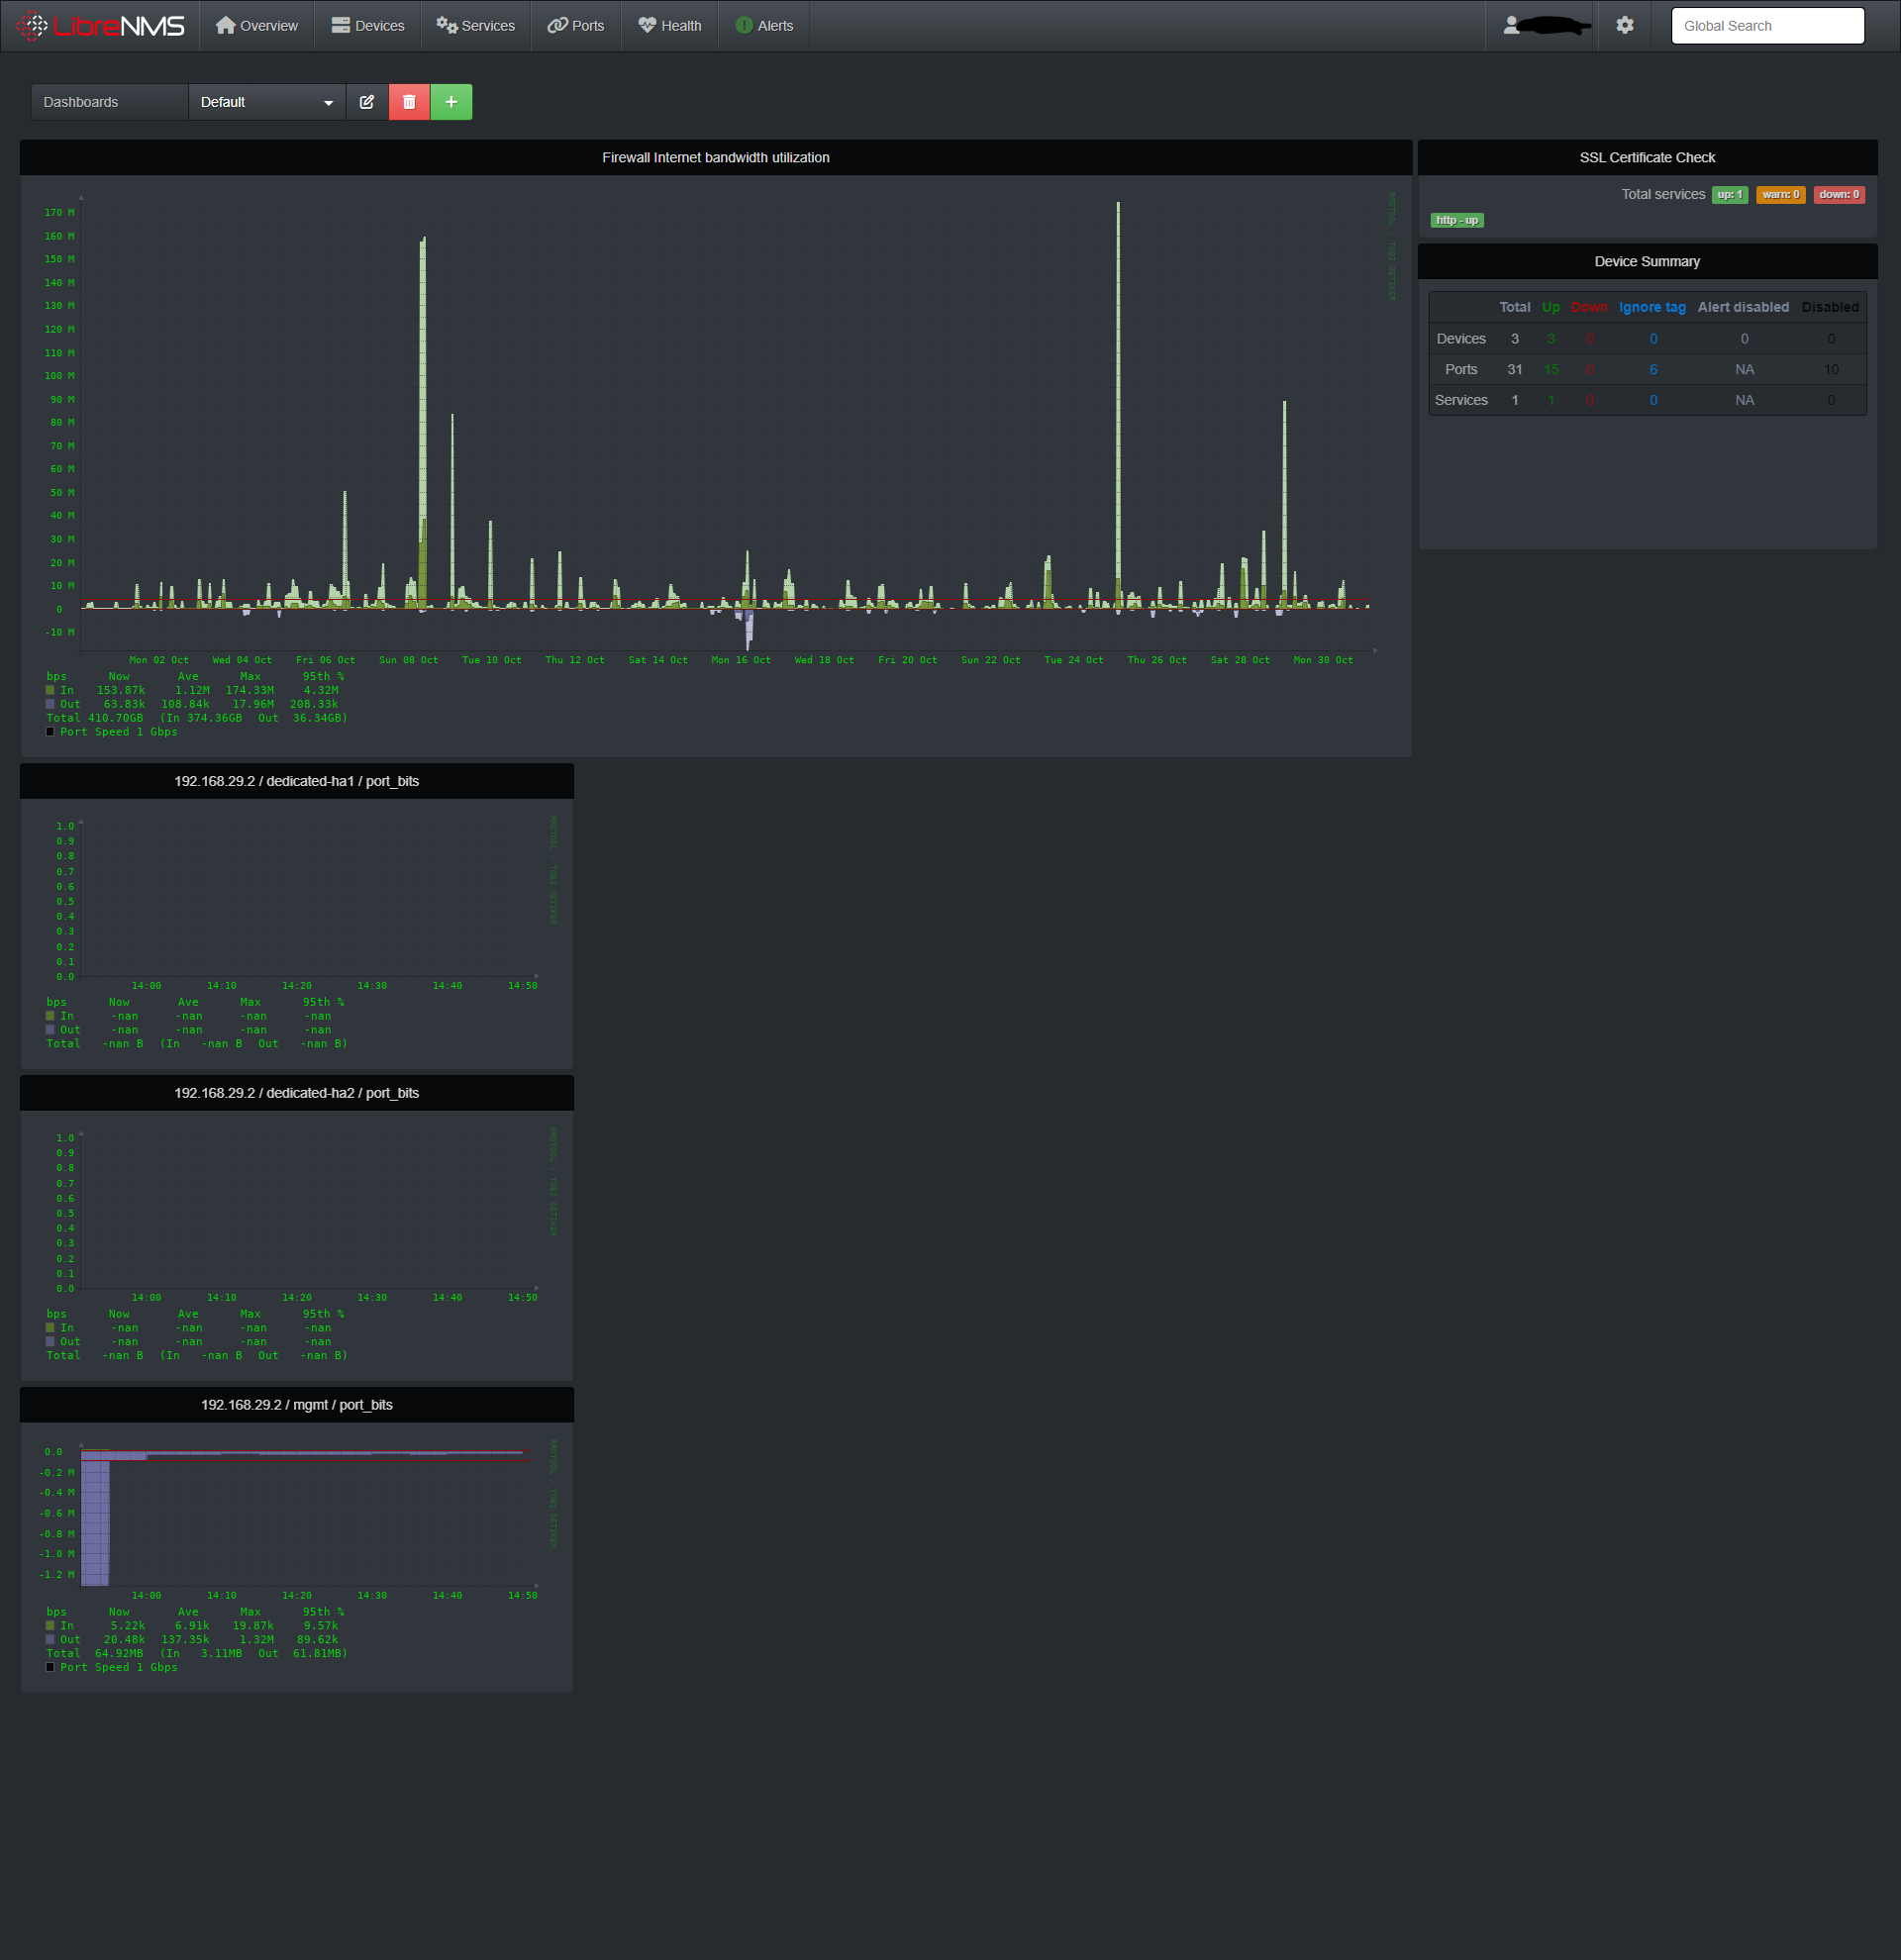
First off, let me be clear about what this tutorial accomplishes. The basic idea is to automate taking a screenshot of the dashboard of LibreNMS that’s displayed when you log in to the web interface. Whatever it is that’s shown on that dashboard is your “report”. Now for my usual customers, they want to see things like SSL certificate checks, graphs of WAN utilization, and things of that nature. Being the script kiddie that I am, I wanted LibreNMS to do the heavy lifting in terms of data aggregation and display, and the tools available on the dashboard were sufficient for my needs (and maybe yours too). So keep this in mind going forward through this tutorial.
Step 1: You’ll need to install NodeJS and Puppeteer on your windows box. I used the following tutorials to accomplish that:
NOTE: I attempted to run Puppeteer/NodeJS on the same Ubuntu instance that I had LibreNMS installed on, but the screenshot would never populate my graphs. I suspect it’s an issue with the headless Chromium instance that Puppeteer runs on Ubuntu, but I have not had this same problem with Puppeteer running on Windows.
Step 2: Import the following three files into your “puppeteer” folder:
Save this one with the .ps1 extension:
$csvpath = "C:\your\path\to\csv\customerlist.csv"

Import-csv -path $csvpath |
    Foreach-object {

        # Sets variables for this iteration of the CSV scan
        $To = $_.email
        $ip = $_.ip
        $customer = $_.customer

        # Generates the report screenshot (.PNG) for every customer configured in customerlist.csv
        # Passes previously defined customer and ip variables for use in the JavaScript
        node .\screenshot.js $customer $ip

        # Waits for the screenshot script to finish before emailing
        Start-Sleep -Seconds 10

        # Defines email fields, SMTP server, and tells where to find the attachment
        $From = "[email protected]"
        $Subject = "Ninjas, in YOUR neighborhood? It's more likely than you think."
        $Body = "This email brought to you by Library Hostage's Powershell script.  Enjoy your report!"
        $File = "C:\your\path\to\customer_reports\$customer\report.png"
        $SMTPServer = "smtp.gmail.com"

        # Creates a new email object and a new attachment object
        $ReportEmail = New-Object System.Net.Mail.MailMessage($From,$To,$Subject,$Body)
        $Attachment = New-Object System.Net.Mail.Attachment($File)

        # Attaches the attachment object to the email object
        $ReportEmail.Attachments.Add($Attachment)

        # Initiates the SMTP client to prep for email send
        $SMTPClient = New-Object Net.Mail.SmtpClient($SmtpServer, 587)
        $SMTPClient.EnableSsl = $true

        # Appends credentials to the SMTP client defined in Google account using app password
        $SMTPClient.Credentials = New-Object System.Net.NetworkCredential("[email protected]", "password");

        # Send!
        $SMTPClient.Send($ReportEmail)

        # After the email is sent, the process starts over on the next line of the CSV, with
        # all new variables for LibreNMS instance IP, email to send to, and customer name.

    }
NOTE: This powershell script assumes that your login for each customer instance of LibreNMS is the same. If you have unique login credentials for each LibreNMS instance, you’ll need to add those credentials to the CSV, assign those credentials to variables in the Powershell script, then pass those variables into the JavaScript and use the variables in place of “user” and “pass”.
Save this one with the .js extension:
const puppeteer = require('puppeteer');
const customer = process.argv[2];
const url = process.argv[3];

if (!url) {
    throw "Please provide a URL as the first argument";
}
async function run () {

        // Launches new headless browser instance and opens a new tab
        const browser = await puppeteer.launch();
        const page = await browser.newPage();

        // Set size of screenshot
        await page.setViewport({width: 1920, height: 1980});
        await page.goto(url);

        // Enters login credentials (leave '#username' alone, change 'user', ditto with '#password' and 'pass')
        await page.type('#username', 'user');
        await page.type('#password', 'pass');

        // click login and wait for navigation to finish loading the dashboard
        await Promise.all ([
            page.click('#login'),
            page.waitForNavigation({ waitUntil: 'networkidle0' })
        ]);

        // Cheese!
        await page.screenshot({path: 'customer_reports\\' + customer + '\\report.png'});
        browser.close();

}
run();
Save this one with the .csv extension:
customer,ip,email
customer01,http://192.168.1.1,[email protected]
customer02,http://192.168.2.1,[email protected]
NOTE: The emails in the CSV are where the reports will be emailed to.
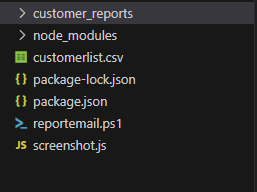
Step 3: Create the necessary directories for the reports files to be created in. You’ll need to make a “customer_reports” directory and then a subdirectory for each customer that matches verbatim what you’ve configured in the .csv file. I probably could have scripted this process, but for my purposes, it was just easier to manually add a directory for each customer. Your directory structure should look something like this:
Once you’ve got these scripts/files imported and made the necessary changes to SMTP settings, passwords, host IPs, additional directories, etc., then you can simply execute the Powershell script. When the script is finished, you should have a “report.png” file in each customer directory that is a screenshot of the dashboard for that matching LibreNMS instance, as defined in the CSV. For scheduled runs, I just configured Windows’ built in Task Scheduler to run the Powershell script on prescribed days/times.
Hopefully this topic wasn’t too simplistic. My goal was to write this tutorial for someone like me who has no prior coding experience and wanted something close to resembling a report feature for LibreNMS.